Prerequisites:
- Active SuiteAnalytics Connect Cloud Service license from NetSuite
- SuiteAnalytics Connect setting enabled
Check Windows Settings
1. Check your windows version, either 32 or 64 bit. Start > Settings > System > About > System Type
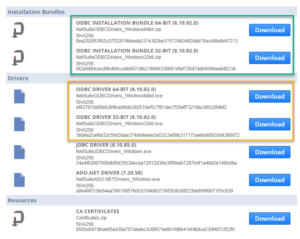
- If you have a 64 bit PC & 64 bit Microsoft Excel, it is advised to download 64 bit driver. If you only have 32 bit Excel or 32 bit processor, you will need to download the 32 bit ODBC driver. – check with your IT administrator
NetSuite ODBC Download
2. From NetSuite home page, navigate to settings > Set Up SuiteAnalytics Connect
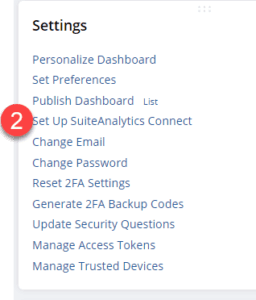
2.1 If you do not have the settings portlet, follow the below steps.
- This will add the settings portlet to your home page. Click Personalize then Settings.

3. Download the correct bundle or driver to your desktop. Either 32 or 64 bit.
Installing the ODBC Driver – May need IT resource to install depending on IT policy for installing software
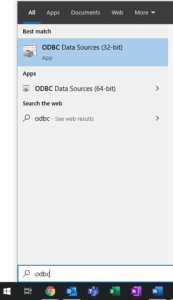
4. Configure ODBC connector – Search your windows programs for ODBC, and open the program. – you’ll see a 32- or 64-bit option
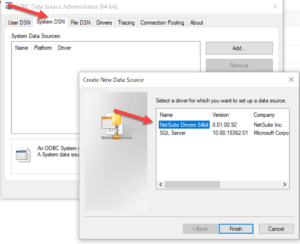
5. Navigate to System DSN tab, > then Add > then Finish
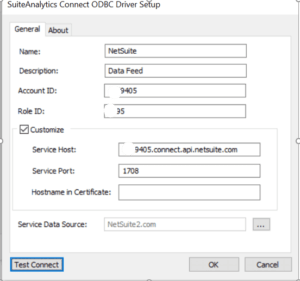
6. Enter the below information – check with your administrator for static Account & Role ID values
- Name > NetSuite
- Description – Data Feed
- Account ID – will be a static value – Check with your administrator
- Role ID – will be a static value – Check with your administrator
- Service Host – accountID.connect.api.netsuite.com
- Service Port – 1708
- Click Test Connection
7. Test Connection:
- Enter Username, Password, Account ID & Role ID
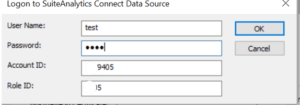
→ Click Ok and save, setup is complete!
Learn More
- 17 Steps to Improve Operational Efficiency. Operational efficiency is all about how businesses reduce waste, increase productivity, and improve the quality of their products and services.
- Spectrum Color Sees New Shades of Efficiency After Centralizing Business in NetSuite. A single source of data helped this manufacturer increase revenue, automate order management and save its staff valuable time.
- NetSuite 2022 Release 2 Helps Protect Your Bottom Line By Increasing Efficiency. When faced with uncertainty, a leader’s priority is to run the businesses efficiently, focusing on robust bottom lines as much as revenue growth.
- The Future of Finance. 90% of CFOs will use automation, AI, and fintech by 2024.
Contact Us and let’s make NetSuite easier today!

